It’s a huge job for any homeowner: replacing a roof. While the process can be daunting, knowing what goes on at each step should calm your nerves and have you ready for what’s to come. Here’s a more in-depth, step-by-step guide on what you might expect during roof replacement services.
1. Initial Assessment and Planning
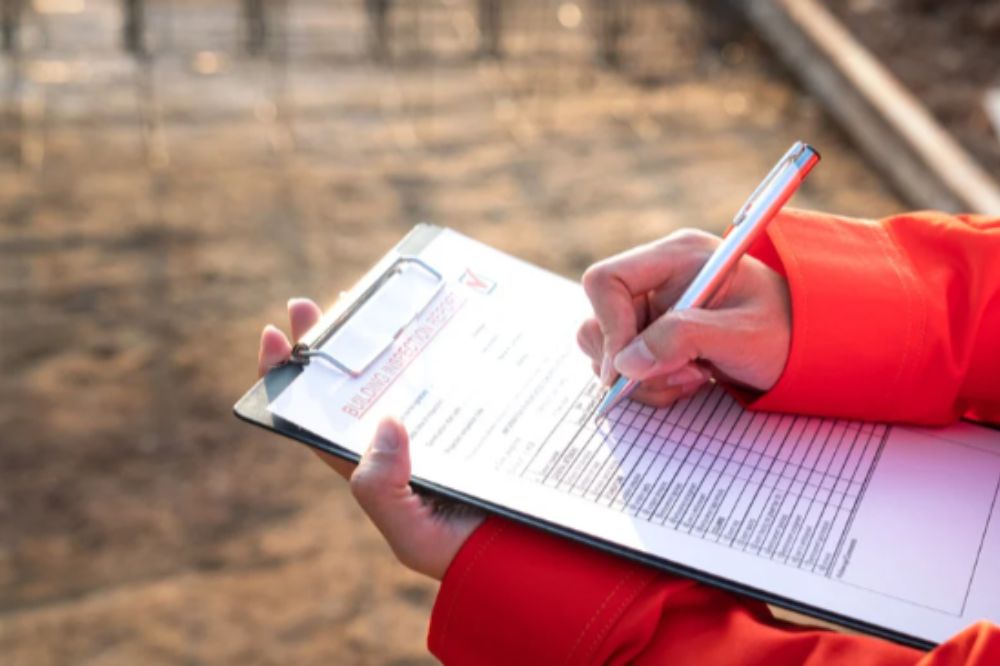
The first step, prior to the commencement of any work, involves an assessment of your currently existing roof. A professional roofing contractor will inspect your roof to identify problems related to leakages, structural damage, or spots that have excess wear and tear.
According to these findings, the contractors may recommend whether one should undertake replacement and produce a proper estimate in elaboration.
This stage also involves the selection of material for your new roof-from asphalt shingles and metals to tile or slate-whichever one will be suited to your preference in budget, durability, and fashion that will be presented for your final decision with the help of the contractor.
2. Obtaining Necessary Permits
Most roof replacement services need a permit, which proves that the job is done according to local building codes. This is usually arranged by the contractor for you. Proper permits are very important to prevent any future legal or safety issues.
3. Preparing Your Property
Preparation is the key to safeguarding your property before replacement commences. Contractors will:
- Clear the Area: Take away outdoor furniture, potted plants, and other items from around the work zone.
- Protection Landscaping: Tarp and plywood protect landscaping and flower beds from falling debris.
- Safety Setup: Temporary barriers are set up or caution tapes are provided to keep off family members and pets by the worksite.
These precautions will help to minimize the risk of property damage during the project.
4. Removal of the Old Roof
From here, the next step is tearing off, which is somewhat noisy and may build up in large amounts of debris; this is a step in which workers tear away shingles, nails, and underlayment in order to expose the roof deck using different types of tools.
Most contractors use dumpsters or trucks for hauling away debris as a way to ensure a clean job site. Understandably, this phase might be temporarily disruptive to your daily activities, especially if you operate from home.
5. Roof Deck Inspection and Repairs
Once the old materials are removed, the roof deck is inspected for any damage. If the decking is rotten or weak, it will need to be repaired or replaced to provide a solid foundation for the new roof.
This is a critical part of the process, ensuring that your new roof is long-lasting and sound structurally.
6. Installation of Underlayment and Flashing
Once the roof deck has been prepared, contractors will then install a water-resistant underlayment. It basically acts as a barrier against water seeping into the roof and causing leakage.
Flashing is also installed at this stage. Flashing is usually made of metal and is placed around roof features, such as chimneys, vents, and skylights, to direct water away from these vulnerable areas.
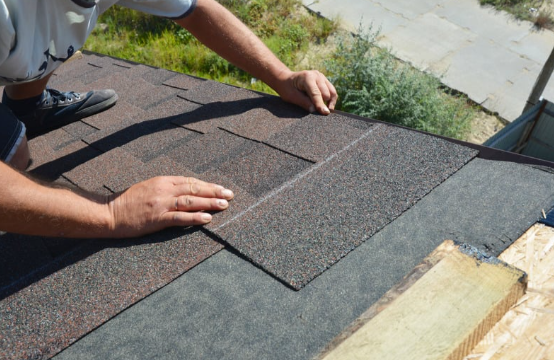
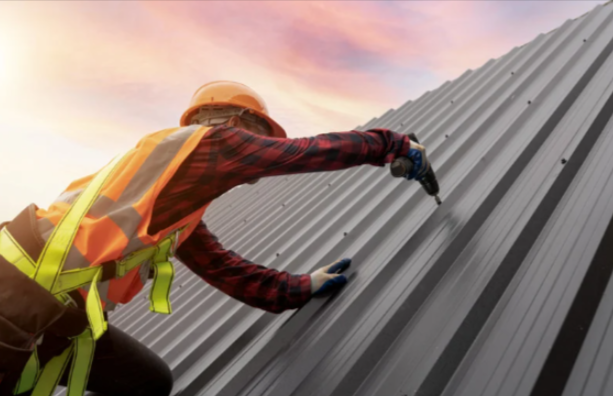
7. Installation of the New Roofing Material
With the underlayment and flashing in place, the new roofing material is installed. The process varies depending on the material you choose. For example:
- Asphalt Shingles – laid in a partially overlapping fashion to make them watertight.
- Metal Panels: These will be attached by fasteners, with seals to avoid leakage.
- Tile or Slate: Laid and secured individually to complete.
This is now the stage when your roof starts to take shape, and the change becomes visible.
8. Final Cleanup
Once the new roof is installed, the contractors will clean up the job site thoroughly. This includes removing any remaining debris, nails, and materials. Magnetic tools may be used to collect nails from your yard, driveway, and other areas.
A clean site not only ensures safety but also reflects the good impression of professionalism from the contractor.
9. Final Inspection
The final step in replacing the roof is a final inspection. The contractor will:
- Ensure the roof is properly installed, current, and meets or exceeds local building code standards.
- Check for proper ventilation and placement of flashing.
- Ensure the job meets agreed standards.
It provides a peace of mind to you, in knowing your new roof is ready to protect your home for years.
10. Tips after the Project
Once the replacement is done, here are a few things you can do to maintain your new roof:
- Schedule regular inspections to find potential issues while they’re still early.
- Keep your gutters clean to avoid water damage.
- Prune overhanging branches to prevent damage from falling debris.
This will help you ensure that you get the most from your investment by following the next steps.
Partner with a Reliable Contractor
Roof replacement is a detailed process that requires skill, precision, and attention to detail. Partner with an experienced and reliable contractor for a seamless and successful project.
Companies like Enduring Roofing & Gutters have the experience and commitment necessary to execute an excellent result. The biggest difference, regarding Replacement Services, is in knowing what to expect throughout every step of the process.
Having an idea of how these steps go will leave you with a feeling of assurance and readiness for the process in your roof replacement journey. This new roof is one major investment in not just protection but also in improving your home’s value and appeal.